Showing posts with label tabletoproleplaying. Show all posts

Dungeons & Dragons Tomb of Annihilation Tomb and Traps set!


I'm delving more into formal reviews of my beloved Wizards of the Coast Dungeons & Dragons miniatures and products here on creative Dungeoneering, and wanted to start with a recent acquisition to the collection, the Tomb of Annihilation Tomb and Traps set.


Being a big fan of the original Advanced Dungeons & Dragons module S1, Tomb of Horrors, and having never delved into Tomb of Annihilation yet, this set by Wizards of the Coast held much more nostalgic value. But one thing I love in miniature form is terrain....lots and lots of terrain! From it's old-school gaming artwork to the famous "Demon Mouth" of Acererak's tomb, The Tomb of Horrors is an iconic Dungeon I have always dreamed of replicating on my own table. 

The box set can be purchased from various online and retail outlets, but we're fans of supporting the folks over at Miniature Market where this set can be purchased for $65 US. 
(https://www.miniaturemarket.com/wzk72873.html) 

The sculpts on the various pieces are surprisingly well done, and with a bit of time and just a small amount of extra work (if even needed) they could be brought up to an even greater level of detail. The sheer variety available for using these for various dungeons and tombs is hard to imagine, with everything from blade traps, spike pits, flame spouts, and even small rubble and gold piles to add flavor to any dungeon or table top terrain outside of this specific game. 


All the pieces are of a strong, well-made plastic poly carbonate finish with a strong durability. I was impressed by the seams and welds of the plastic on the little details too; things like the way the reflective surface of the portal is set into the frame of the doorway, the solid fixture of the flame spouts into the tile, and even the details and durability of the carved demon face. 

The crowning piece for me personally is of course the Demon mouth, set into a stone finished wall. the finish is good, albeit maybe just a tiny bit too shiny for being an old dusty tomb statue. This is the icon of the Tomb of Horrors, and without giving too much detail away, has created far too many TPK's (total party kills) throughout the history of this module! Great fun, and an icon of vintage dungeon crawl role-playing. 


The 4 flame spouts and 4 blade trap tiles are well made and will be great fun, to use in multiple dungeons and settings as well. Finish is good on both, but a bit glossy on the spikes/stalagmites/blades of the spike tiles. Seeing these in a dark, tomb-like setting however makes more sense, and I've grown to actually like the slightly black gloss finish. 
I'm thinking of double damage here: Spike trap with a slithering Black Pudding swirling about between....talk about total party kill...


The spike pit tile and boulder pile tile were somewhat less impressive, and in need of a bit of dry-brushing or additive coloring to bring out the highlights and depth. I love what Wizards has done with the "depth" on the spike pit, but the flat matte coloring makes it tough to see.

Highlighting these presents a plus and a minus however from a collection standpoint: To edge and paint would make them truly, better pieces, but takes away from their original out-of-thebox state...the clash between Creative Dungeoneer and Collector...


The sarcophagus of Acererak and the portal are both solid and well made, but like the spike pit, the  sarcophagus is somewhat lacking in detail, and could sue a nice brownish-black wash to bring out the edge highlights and side-hyroglyphics.


The other small details, and I do mean SMALL, are outstanding but it will take an extremely well-organized Dungeon Master to keep track of these items including the four potion bottles, the sword, shield, scrolls, and skull of Acererak.

The details and clever design for bringing the campaign to life are incredible, but even as organized and meticulous as I am over my D&D mini collection, I worry about losing these before they get any tabletop time.


All in all this is an outstanding set by Wizards of the Coast, and brings to life both vintage-styled nostalgia and modular usability for great dungeon terrain!
This will surely be featured in some of creative Dungeoneerings upcoming Game Tales.


THE CRATER PLAIN BATTLE BOARD!

Deep within the bowels of the Creative Dungeoneering catacombs, in the icy depths of the lost north & away from the prying eyes of other terrain creators, gamers, and adventuring parties, the Polar Bear horde crafts away with foam and glue and paint to create the next generation in modular terrain...the Creative Dungeoneering Crater Plain Battle Board!

While similar in design (and construction) to our previously designed modular gaming battle board, the Crater Plain version we created here is quite a bit larger.
A larger board is not necessarily always a better board however. And often times it can present too much terrain and distance between armies for initial set-up.

When being used for war-game play (such as in Warhammer 40K), timing can be slow, and take hours for rounds to complete. This is less of an issue when being utilized for role-playing terrain, and serves well for adding large scale modular additions such as mountains, cavern accents, and hills and mounds.

The goal of the Crater Plains board is to provide a few notable and useable features for Sci-fi table top wargaming or role-playing, or serve as a basis for additional role-playing/fantasy use. But it's crucial feature its both its size and its emptiness, or its lack of features!
Space-as in empty space, left bare, flat, or without additional features serves well to a dd additional features on top of, so this board needed an ample amount of surface area from which to build future expansions, thus ensuring it was truly modular. 


The main features of the base of the board other than the stone textured finish are it's 4 main craters.
I started this board in our standard secret black foam core (1/4" thick paper-backed foam core or 'gator board' often used in the advertising and design industry) and carved the craters into the foam but not through the paper on the underside.

After this was completed, lightly sanded and smoothed out, the entire board was coated in two full cans, evenly and SLOWLY sprayed over the entire surface, using Krylon brand Stone texture paint in Coarse Texture Black Granite. The 'Black Granite' is really more of a gray and white speckle, but works well given the foam core itself is black. But for a board of this size it did in fact take two full cans-not the cheapest method, but the best long-term.

The key with texture paint is two factors: Warmth and Wind. Try to use it in a warm (or room temperature) location if possible, not outside in the cold. And NOT in wind. Any! Not even a slight breeze. This means indoor use is the best but the smell of this can be quite pungent, so just the right conditions for a space this big is crucial.

Once sprayed and dry, the small-detail edge painting began. And this is where Fantasy Geology comes in.

Because I wanted the craters to look real and like they had some actual purposeful growth or algae forming from within, I paid close attention to the cracks and crevices on which paint was applied. Only placing small dabs of dry-brushed toxic green over raised surfaces like a growing alien or deep cavern mold of some unknown variety.

For the purplish hue on the edges, this was applied using a dry brush technique of dabbing an old brush lightly into a deep purple acrylic craft paint, removing excess on the pallet, and then in a swift dabbing, semi-rough maneuver, allowing just a tiny bit of paint to settle into the stone surface texture along raised edges of the craters and where cracks formed onto the surface.

This gives the look  of an alien growth or crystalized algae of some form creeping over the lip of the crater and through the small cracks to the surface. For final preparation I may be adding a dab of gloss varnish to these areas to give the looks of natural crystals, but keeping this board minimal in its design, allows for multiple uses and potential areas and genres it could be used.


NEXT:
Finishing the board, sealing, and final touches......
Now, back to the icy depths of the great northern catacombs, where the Polar Bear army is getting restless. Great gaming terrain is only as good as the adventures that take place upon their surfaces.....


Sci-Fi Terrain..Part 2!

The priming continued this weekend with the completion of a whole gaggle of Sci-Fi Terrain.
Finished painted pieces may appear at a  later date, but primarily for now this will detail individual ideas and inspiration for construction.

The names are completely arbitrary of course, but I tend to go for a slightly less "doom and gloom" view of the Warhammer world. Think more "Warhammer meets Star Wars" so much like the lines and accessories here, I try to allow the terrain to take on a slightly more clean look too.

The key in sharing these is the potential in their visual identity:
Find items that look like they have a purpose in the Universe for which you are creating-regardless if your entirely sure what they are or even how they work.

These are just brief tutorials on what went into the make-up of these pieces, but further posts will (hopefully) follow as these pieces have all been sent out for some volunteer custom paint work by contributing Dungeoneer artists who will be contributing to the Creative Dungeoneering realm with their talents. More on their progress to come...

Moisture Evaperator


This was assembled with standard white pva glue, and comprised of a bar-end cap from a set of roof top Yakima brand bike rack bars, the stub of a space marine torso from an old Rhino tank, two white plastic coffee straws, and a few random plastic bits torn from an old circuit board (see last post on Sci-Fi terrain).
The real key here was the varying level of the straws serving as 'antenna' that give the piece a functional look. The small coil on the side is actually a roll of copper wire from the circuit board, so this should add a nice touch of realistic metal once completed.

Planetary Beacons


Beacons, industrial tubing, old spacecraft parts...whatever your imagination comes up with. But when you prime sprinkler parts, and what I think was some form of 'juicer piece' the results are something right out of the 41st millennium.

The beacon to the left was made with a sprinkler part from a local hardware store glued atop a small led tea light. Tinfoil was placed inside to reflect the light and give it a slight flickering glow like fire.

This bottom piece is some previously saved and currently un-remembered piece of unknown plastic, but with one odd catch: It's either REALLY expensive, or...not.
the ring around the spires is the metal watch face lock ring to a TAG Heuer watch. yes, THAT TAG Heuer. But since I purchased this off the street in Jakarta Indonesia from some shoeless kid on a broken down scooter, I can't say if it's real or not.
I can say that when I took it to a jeweler a while back they wanted to charge me $75 for the battery, so rather than divulge that I paid 41,253.00 (Indonesian Rupiah, so like $3 US), I kept it. Does that mean it's real? Who knows.
After he got my three bills he was off on his "previously claimed to be broken" scooter faster than lightning. Good story...mediocre watch. But it makes great war game terrain!


Fueling Spires/Landing Beacons/Parts Piles


These are similar to the Planetary Beacon above in that I have no idea where they came from, but they made excellent terrain. Parts for the stockpiles of materials being waited for transport are random bits from the electrical motherboard I pulled small "greebles" from previously. The cones and base are odd plastic affairs with no remembered identity.

Command Bunker


This is constructed from a cardboard tube cut in half and fixed with wires and a small Warhammer tank hatch from a previously unused section of Rhino.
The base to which this is fixed is a thick foam-core used in advertising signage, but any reinforced cardboard or foam core will work. The advantage of the foam base is the ability to not only "sink" accents into the ground, but also to give the ground a surface of it's own.
The tanks to the right of the entrance is actually a small cell battery, primed and inverted.
For the door accents I used a small plastic square piece that accompanies bicycles upon purchase to hold the cassette into place. Most bike shops will discard these when building bikes, or likely give them away for free, as they are unlikely to associate much use for them in the role-playing or creative gaming world. It's rare that these two realms ever mix...

Ruined Tower
The other half of the cardboard tube that was used for the Command Bunker above was utilized to make  ruined tower and the small guard walls.
Additional metal greebles and electrical parts were stacked on top of a foam core base along with various small parts and random bits to give the look of a dilapidated and crumbling tower.

Notice here how primer was laid on extra thick.


This was done on purpose to allow the paint to seep in and cover the metal. It needed to be thick to cover the visibility of the pieces being modern (or mundane), but it would also allow for some variance as this will primarily be dirt, dust, rubble, and old foliage.
Additionally, those gaps where the paint is at its thickest will be filled in with pieces from the Citadel Skulls collection - highly recommended for a adding some dark battlefield doom to your terrain.

Sci-Fi Terrain!

Sci-fi terrain (Star Wars, Warhammer 40K) is TOUGH!
It hurst my brain...like algebra or 9th grade math. My modeling style naturally falls into forests and caverns and crystals and trees and mountains and all kinds of organic creepy crawly shapes and forms.....
But not angles, lines, boxes, widgets, buttons, and "greebles" as I've heard them called before (small accents that look like they have a function but in reality, do not).

So in creating Sci-Fi terrain for Warhammer 40K and Star Wars RPG use (although I do not currently play SW RPG, but would someday love to...), I found it tough to make the mental switch from one genre to the next.
I needed help. a computer. Or maybe just a broken jacuzzi motherboard.

This turned out to be just the inspiration I needed. I had no problem coming up with "shells" that looked like they had "futuristic potential," but it is the small fine details that made the difference. And this old leftover piece from replacing a jacuzzi spa heating system was perfect.
Wires were used throughout as well, cut and shaped, and even the ends made for interesting lines and edges to give each part character.


Ion-Relay Pipe:
This was made from a  heavy base of actual brass pipe, with various small parts scavenged from sprinkler repair.
I added the white plastic ring at back (the inner workings of a fake (I hope) TAG Huer wristwatch (purchased for $3 USD on some Bangkok street corner), a small wrap of wiring on the front, and a nozzle from a foam fishing bobber cone, inverted and screwed into the plastic gray pipe.

Bits were added to the top from cut wire ends, small beads, and even a few plastic bracelet pieces from my daughters nightmarish craft horde. Small white side pieces and base bits were ripped from the circuit board, all of which I am far to dumb to identify...but they look great when primed.
Edges, small holes, squared lines, and architectural structure that implies meaning or purpose beyond the need to understand.


Fusion Relay Station
This one turned out as the biggest surprise thus far.
I threw this together with extra parts thinking I'd just see how it turned out, and it's ended up being one of my favorite.
I started with two round foam fishing bobbers, and inserted simple coffee straws as antenna into the top, giving each a different height for some visual depth and detail.
I then fixed a small brown ring handle from an old cardboard shipping box in between the two, cutting a slit into each foam side, and creating a form of "window" or control screen.

Once I added the small circuit pieces and battery parts to the top, sides, and front panel of the base, it started to take on a very 'functional' look, as if each piece has a purpose, we just are not entirely sure what it is. Thats the essence of a good greeble I think.
When primed, the foam takes on a  slightly pitted look, giving it the finish of old plaster, sandstone, or stucco.
Perfect for a desert or deteriorating structure on some far away world.


Part 2: 
Trooper Outpost, Planetary Beacon, Carbon turbines, and Ruined Tower and Scrap Heap.


Stonework Steeps!


I know I know....."modular modular modular."
I preach that all the time.

But the versatility, storability, mobility, and playability of modular pieces is just SO much fun, and they are a constant challenge to create.
Plus, when your imagination varies from a love of all things D&D to the carnage of Warhammer 40K, having pieces that can work for both saves a bit in the "Gaming Terrain Finance" department too.

So this weeks project was creating a sense of muddler stone columns, but made to look like natural rock. I wanted these to be able to be used in various forms of terrain. anything from mountain to forest to underground cavern settings (although the end result, while nice, does slightly limit  the potential use (in my own opinion) to underground cavern settings).

I started with my standard building material, hardened, paper-backed foam core or gator board (see the previous Creative Dungeoneering post on the Battle board made from this here:
http://creativedungeoneering.blogspot.com/2018/01/battle-board.html)

I shaped these with a thick and rough pair of scissors and then smoothed the edges with a soft sanding block, before gluing them together in equal-sized stacks with standard pva glue.

Once done, I added layers of paint over the black foam core and paper backing in the following order:

  • Primer gray-standard gray primer spray
  • light gunmetal gray: any med-to dark shade of stone gray would work (or red, brown, etc).
  • soft gray: I used a softer, almost white gray here, dry brushed over the top to create edge highlights and give the stone a worn texture. The same would apply here though for other shades of red, browns and whites.  
Once the stone work was completed I added a thin layer of pva glue to the top, and created a flocked top layer using standard flocking materials. Green hobby store grass material (think train building sets or model diorama terrain) works well, but I also use a mature of old pencil shavings, pva glue, and a light dab of green food coloring and paint and mix until dry. This gives some texture and depth too (more on this in the next post on Aspen trees and natural terrain).


Simple. Pretty fast, and these were made almost entirely in an evening-about 2 hours +/-. 
Effective for use in wargaming or table-top roleplaying as added terrain features, archways, gateways, columns, pillars, or even over-water type features.

There are a ton fo add-ons that could be done to these too:
  • Stalagmites/stalactites from some fo the small overhanging rock edges, then done in purple (Underdark or crystal-type) hues or even painted with snow flocking to represent ice or winter terrain. 
  • Extra foliage or moss on the edges
  • Water-spray, or bases of hot glue and water-type features giving them the look of being suspended in or above water. 

Just great simple little pieces with a lot of creative potential. 


As for cave terrain, I intended originally to make these modular to where they could be used for an Underdark campaign as well. But I am a huge fan of the more purple-gray hues that are found in the Wizards of the Coast and Gale-Force 9 Caverns of the Underdark sets that I currently use and match terrain too (see some of the previous Creative Dungeoneering posts on these in our archives...) so it was tough to justify the purple hues needed with the green flocking. 
As much as I love modular terrain, I love making it match even more. Thus, these are primarily for "above-ground" use. 


The Tragic & unheroic Death of Caloren Kuri'n

I live in a beautiful little mountainous corner of the Salt Lake Valley.
While there are plenty of role-playing groups here in Utah, there are for whatever reason, not very many in my immediate area. Nor are there players with enough creativity and over-imagination, that I have thus far found, to suit my tastes for immersive playing; from miniature table top worlds to smells, sounds, and even dress.

And so it is with some reluctance but also, some youthful excitement that I venture into the world of Dungeons and Dragons Solo adventures.

I opted to create a brand new player, level 1, from the Dungeons & Dragons traditional Red box set, completely by the book. No jump starting to Expert Rules, no high-level Solo adventures, but Level 1, and right into the world of all available vintage D&D Solo adventures.

This blog will chronicle the adventures, as I play through them all one0by-one, starting with the original included solo adventure in the Dungeons & Dragons basic set, circa 1983.


Following this first solo adventure, I will be moving on in the following order, as experience (and characters) allows:

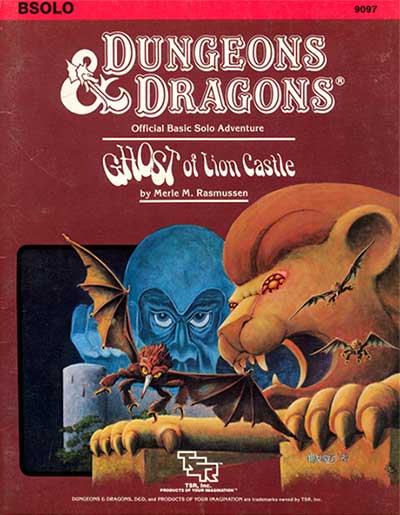
BSolo- Ghost of Lion Castle


XSolo-Lathan's Gold


M2-Maze of the Riddling Minotaur


                          CM5-Mystery of the Snow Pearls      


D&D Basic set, included Solo adventure (Red Box):

      Caloren Kuri'n grew up in the small village of Hillsreach and somehow avoided falling onto the same expected path as that of his friends; joining the local territorial militia and being marched off to the slaughter some years back. The border war with the neighboring Orc horde and left all but the fewest of survivors, and a once thriving village was left little other than a deteriorating ghost town as a result.

He did however, love the wilderness. And as a great admirer of both adventure and the Elven cultures of the western regions, he sought out adventure and the potential for fortune that came with it.
He thought, probably fittingly so, to begin this somewhat questionable career path at a series of old caves not to far from his home.

Since boyhood, the local caves had been the spot of dares, challenges, fights, and fortune, rumored to lie within the depths of the now abandoned halls and unmapped catacombs of dwarves ruins. He had never really ventured in very far, maybe only 100 feet or so, but then again, no one did. Well, except for Keithard Weaslent. And none had heard of him since the day he ventured forth, 17, armed with his fathers stolen sword, and a simple sack. It had been nearly 15 years since that day, and Caloren had never forgotten watching as the town bully, on a dare by the millman's son, Chadwick Laurent, ascended the small set of stone steps and entered alone into the depths, never to be seen, or heard from again.

But this day was different. Armed with a sword received as a glorious gift from his neighbor, the widowed lady Blackguille, and armor freshly purchased from the town armourer, a family friend Caloren had known since childhood, he was more prepared than ever to find either fortune or at the very least, fame, and possibly the remains of of the long lost boy.


Caloren entered the chamber, and came some distance into the darkness, stopping to light a small lantern he held aloft. The walls were of crude carved rock, but empty braziers sat evenly spaced along the hewn cavern walls, unlit for an age.
He soon came to a large central room, with passages stretching into the darkness north, west, and east. In the center of this strange carved room, sat a large statue. The stone was faded and worn, but the image was clearly that of a once beautiful woman. Finding nothing of consequence, he began to venture eastward where a small glimmer of reflection caught his eye.
As he looked to the wall at his right, he saw there a small round metal clasp, and within the rotting leather tie, a faded roll. He slowly peeled open the deteriorating tie and found scribbled in a chalky dried script, three simple statements:

EAST ARE RATS
NORTH ARE GOBLINS
WEST BEWARE!

 Caloren opted then to take his chances first, with the rats. He ventured cautiously down the cavern passage at his right as it twisted and turned past a section of dripping stalactites. As he moved slowly around a left hand bend, a sudden screech filled the small cavern as a great rat let from a perch above and towords his head. 
The cavern filled with squeals and mad cries as rats squirmed from crevices in cracks in the walls, rallying to the cry of the lead attacker. The rats of the region were known for being quite vicious, and quite large. These were particularly nasty, and standing on all 4 resembled that of a medium sized canine rather than a typical rodent.  vicious and cruel, they were a tortured and vile breed, bred from filth far below and surviving through the scavenging and the canabalism of their own kind. It was a rare treat for the rats of the Hillsreach mountains to get fresh meat. 


Acting quickly, Caloren stepped back, swinging hard and slicing the rat clean through as it sprung. Quickly another attached at his leg, it's claws sliding harmlessly off his metal greaves. 
Swiping down and at once lancing the beast, it squirmed and fidgeted beneath his sword point as its foul blood leached out over the smooth stone pathway.

Setting the lantern down and searching cautiously, Caloren saw little else as the cavern pinched off to smaller and smaller veins, the twinkling eyes of more rats than he could count staring back from deep within their stony crevices. 
As he proceeded back the way he came, he chose to venture down the easternmost hallway. Giving up on the sense of avoiding potential trouble and facing it, or at least based on what the note said, the potential of facing it, head on. 

The North tunnels grew far fouler than that of the eastern passages. As he walked deeper into the dry and rocky caves stretching north, the signs of the dead and dying increased with every step. Bones littered the floors and rocks, blood, some peculiarly fresh, seemed splattered randomly. 
The sheer number of bones when examined was staggering. And some seemed quite human in shape and form. For a cave that was supposedly long forgotten, it seemed to have seen plenty of death.              

As he entered  a small alcove, at once two small figures turned from a huddled pile of freshly gnawed bones, each slowly turning towards the approaching light. 
Goblins.  


Goblins are rarely something feared by adventuring parties, but when in need, they can be a ferocious and deadly foe, and an bloodthirsty lot set on nothing other than devouring their prey, preferable alive. 

As the Goblins sprang, Caloren made quick work of the first, swiftly setting aside the lantern as he parried a blow with it's cruel short sword.
Drawing backhand arcing swiftly left, he slid his blade deftly across the attackers throat, letting the black blood spurt across the small cave and leaving the goblin gurgling for life on the cavern floor as the second attached. 

But the ferocity of their bloodlust was too much. 
The Goblin immediately slashed, using its free hand to swipe at Caloren's exposed thigh, slashing through leather leggings and into his right leg as it tore with it's short sword in an upward thrust.
Blocked, slid, and slashed, the Goblin fell back as Caloren pushed it away with a  swipe, slitting it from check to shoulder, but leaving it only frenzied all the more.  

Before he could retract, or stabilize his footing, the blade of the Goblin found its mark. The rusted edge slid crudely up under Caloren's exposed breastplate and deep into his gut, twisting and tearing through flesh and sinew in a horrendous slurch. 

Blood flowed, he fell to his kneess, and at once, his world grew black as the teeth of the goblin sprang, slipping beneath his helm and deep into his open throat. 

At once his world became pain and terror, as claws and snarls and teeth ripped ever faster into his still dying corpse. 

The old caves of Hillsreach, claiming another soul who would no more see the light of dawn....


So my first Basic D&D character...was killed...by a goblin. 
As an extremely experienced AD&D, 1st, 2nd, 3rd, 3.5, 4th, and even 5th edition player....this is a bit embarrassing. 
But one fantastic trait remained: As I remember the two hour session, playing with music, an elaborate Dwarven Forge cave set up, building each piece as Caloren explored further into the caves, the memory of that story seems as real and as fresh as playing with a  group. the true sign of a good gaming session. It was a brief escape, an adventure, and a journey into soemeplace unknown. 

Perhaps my elven fighter will be somewhat more equipped for the basic solo adventure next time....