In an effort to really keep the number of dungeon and table-top role-playing accessories and terrain pieces I have to a minimum, I have, as mentioned in my last post, gone pretty much to collecting and creating story lines, module and dungeon plot lines, and detailed-miniature scape's with pre-made, pre painted, and pre-fabricated pieces.
I suppose that once I again, amass a collection of hand made items, I will likely, after much documenting and posting here, sell these off as well. Who knows, maybe there is a market for these, other than the plethora of sellers already producing crappy hand-made items via their "eBay store."
I personally, want my pieces looking as realistic as humanly possible. I have been shocked and disgusted with some of the crap other gamers turn out for use as table-top terrain. Why have it at all if it doesn't look absolutely fantastic.
"Your supposed to sue your imagination" one might claim-true-but then why have table top miniatures at all?
But I feel the same way about my gaming space too. I was not satisfied playing at a "kitchen table" so I built an entire room into my home complete with hard wood floors, floor to ceiling shelves, fireplace, leather chairs, flags, statues, bones, spell items, old tomes, and artifacts from all over the globe...a proper English study that looks as though it came from a turn-of-the century English mansion.
Still hunting down pictures but I'll get into Dungeoneering interior design space soon enough...
Onto the newest design project!
Lava Pit:
I have recently acquired a couple Dungeons & Dragons collectible miniatures for Cultists of Orcus, and a Death priest of Orcus (who, by the way, looks suspiciously similar in it's horned headdress to the priest of Kali from Indiana Jones and the Temple of Doom...may have to use this mini to do a future post on modifications to D&D Minis...). With a D&D Collectible Aspect of Orcus miniature on it's way, I of course, must have a bubbling pit of Lava from which to call forth the Aspect! Throw in the poor slave-sacrifices and walla...you can create a generally macabre scene of evil for a magnificent Demon Prince like Orcus!
First.....
These projects are all formed from DAS clay, air hardening modeling clay. Available for various prices in various size packages from local hobby stores.
Tips on creation:
- Don't try to use their tin foil packaging to keep the air out once you've cut it open. Stick the whole thing in a big zip lock bag to keep the exposed unused clay from hardening when not in use. It's pricey enough to not want to waste anything you don't have to.
- Pull a chunk out, re-create those Play-Do molding day's of yore (minus the eating of course if you were into that...) and make sure you use in a well-ventilated area. This stuff can stink up a room with the toxic aroma of chemical exuberance in no time.
- find a tool or two you can use to aid in molding and texturizing, but be cautious to only use ones that you can devote to this. The powder coating in the DAS clay doesn't really come off, and will pretty much kill the tool for anything other than menial dirty use.
- Wash hands thoroughly when done. You ll notice a fine white film coating your hands after molding, strong smelling...bad tasting.
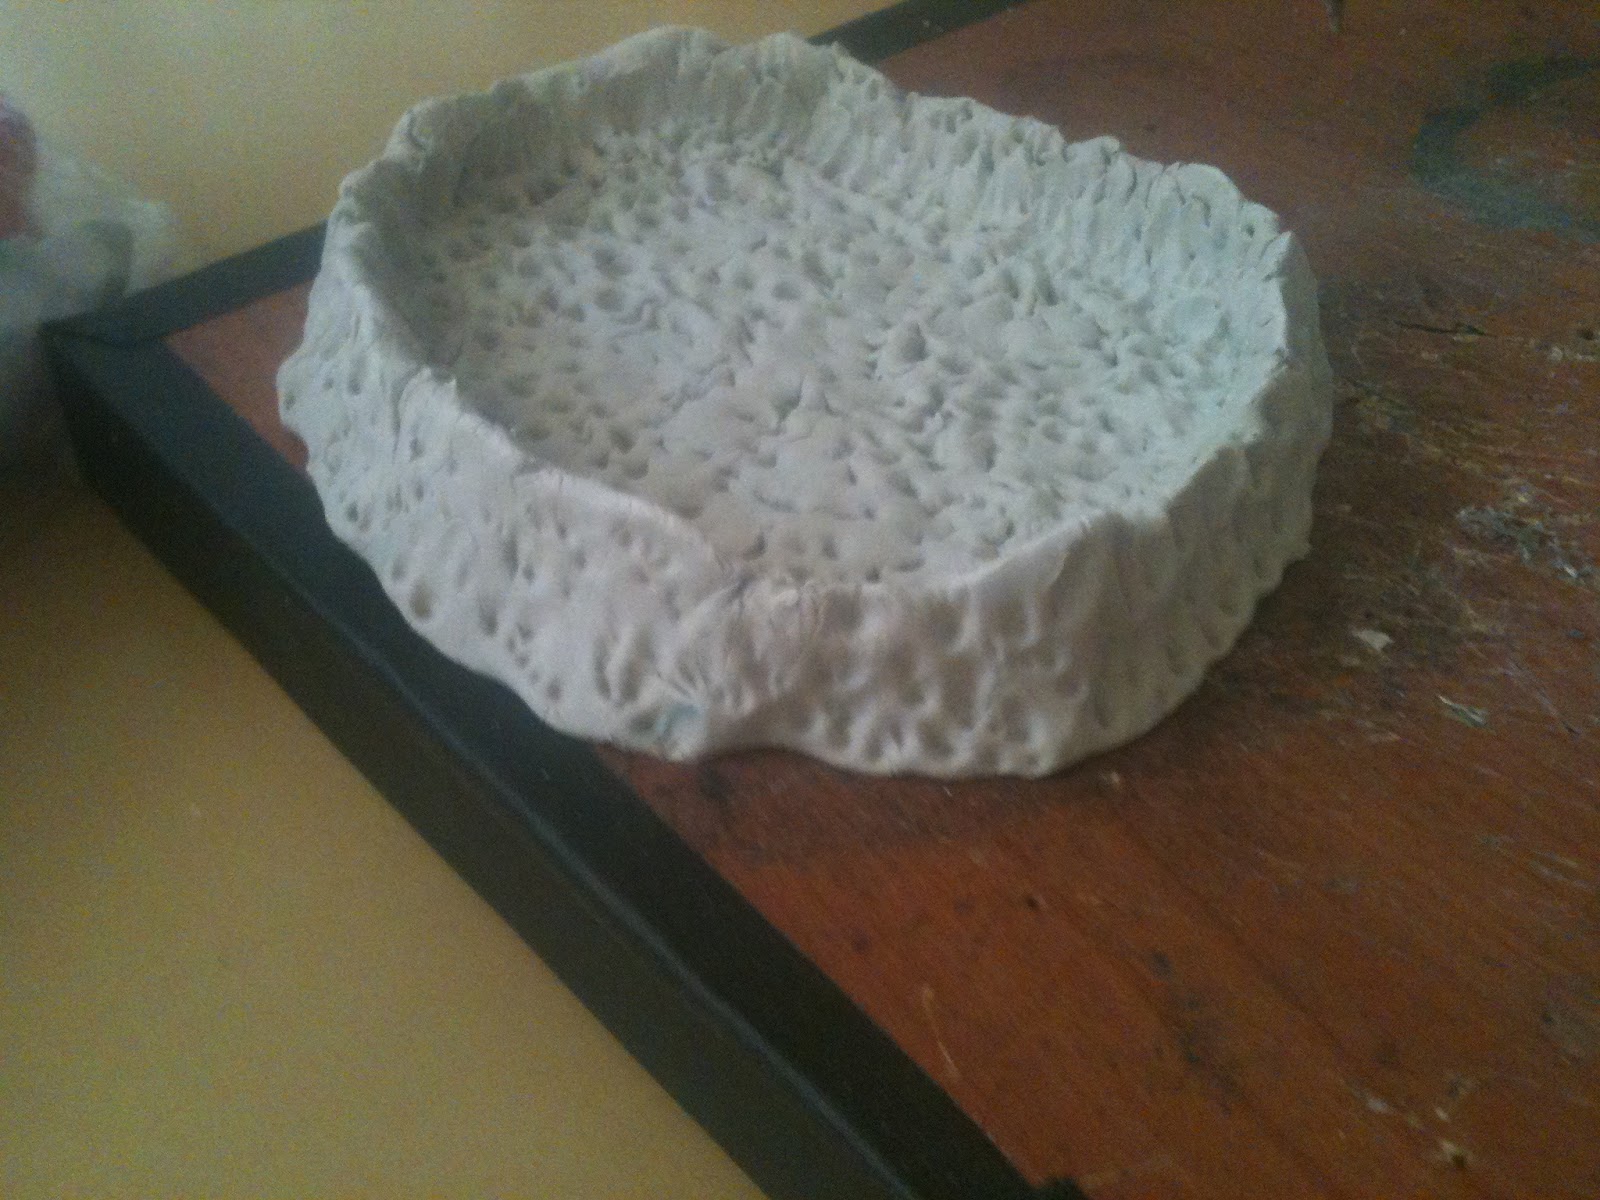
Lava Pool:
Started with a basic flat section of clay, molding up into rocky, uneven sides, and then sued my tool ( a vintage walnut cracking pick from a local second hand shop) to poke, prod, and roll the surface of the tool into the moist clay to give the base a pock-marked lava look. I also used the rounded end of the small metal pick to distribute the clay in uneven "flows" along the edges, giving the look of a crater.
Stalagmite mound:
Molded spires into thick sloping groups around a central base of fairly flat clay. Used the rounded walnut pick (seen in right corner) to sculpt the sides of the stalagmites in a downward motion, giving the hardening clay the look of old flow stone or dripping and drooping rock from minerals dripping from some ceiling above, pooling into soft pouring slopes of rock below. I wanted enough surface area in the middle of the stalagmites to be able to not only place 1 to 2 miniatures for game play, but also to provide a potential passage, tunnel, walkway, trap, dead end "look" or even cover should the stalagmites need to serve as blocking during an in-game ambush or cavern battle.

Mushroom stacks:
Having just acquired some Dungeons & Dragons Miniature Deathcap Mushrooms from Strikezone Games (http://shop.strikezoneonline.com/Category/Games.html), and they were a fantastic price and arrived REALLY fast by the way, great plug for these guys...
I wanted to try my hand at adding a few in double stacks to match. These will likely be painted to match, and if I come up short, they'll be modified to be a different species likely via paint and coloring effects.
These were tricky, because DAS clay doesn't really stick to itself as separate pieces that well when they start to dry with little or no pressure between layers. thus, I found that forming the stack and the cap separate, and suing a tiny dab of super-glue between the two layers did the trick. Otherwise, I was having to smash the mushroom cap down to adhere it to the clay of the stack, and as a result, the mushroom stem became "squat" rather than firm and slender as on the D&D mini version.
These will be added to a black rounded base to mimic the look of the D&D official Deathcap mini as well, as I'd like ti sue them in conjunction with the original versions to create a subterranean mushroom forest for future cave scenarios.
Textured the stems and tops with same tool, rounded edge of base of tool, sloping stem accents with the sharp end to give a "growing" and natural look.

Next stage: Painting and bringing to life, texturizing, and adding lava effects.
No comments:
Post a Comment